Top_Nav

Archive | how-to

Basic Image Tone and Color Adjustments

Your photo is blah!  What’s one to do?  Adjust the lighting and retake the photo with the hope that it looks better?  Nah…that would be so 1990’s!  Adobe Photoshop has some very cool features that make image editing for tone and color adjustments a breeze.  Even if you are not a pro at Photoshop, you can achieve great results with very little experience.

The way we approach tone and color adjustments in a photo is to start with the big adjustments that will affect the overall look of the image and then work on the small stuff, the fine tuning of the image.

Adjusting Color Levels

We usually start working with the color levels.  The default setting will suit most needs.  There are three color levels you can use to alter or enhance your photo.  They are the white, black and mid-tone adjustment sliders.  These three sliders are located on the bottom of the histogram graph on the right of the Photoshop work area. Continue Reading →

Basic Image Retouching

Basic Image Retouching–it’s fast and easy!

The Photograph Blahs!

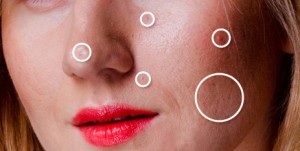
retouching 1Most people are not happy with photographs of themselves.  When we see a photograph of ourselves, we immediately focus on that small pimple that to us looks like the Swiss Alps or we see wrinkles that we think age us 30 years. Photographers have to contend with this type of thing on a daily basis.  Their customers and even professional models often ask (or demand :), “Can you remove this?” or “Can you fix this?”  Well, in most cases the answer is yes!

We work with a lot of photographers and studios that request that we remove imperfections in picture of fashion models, wedding pictures, school pictures and other family pictures.  Photographers send us pictures that require complex image retouching or, in the case of a school photographer, a large volume of images.  In either case, we can handle these types of orders quickly and expertly. Continue Reading →

How to Convert Raster to Vector Images Using Presets

Convert raster image to vector

There are lots of programs available for converting raster images into vector images: Illustrator in Adobe is one of the best way in converting raster to vector images using the feature presets.

Note: This tutorial uses Adobe Illustrator CS5. Functionality is essentially the same for newer versions of Illustrator, but the screens will look a little different.

The first step to convert raster image to vector is to choose an appropriate image. Large, high contrast images are ideal.

Open the file in Illustrator and choose the Selection tool. Click on the image you want to vectorize and the image’s four sides will turn light blue to let you know that it has been selected.

Next we turn to Live Trace to transform the pixels from your original images into lines and shapes.

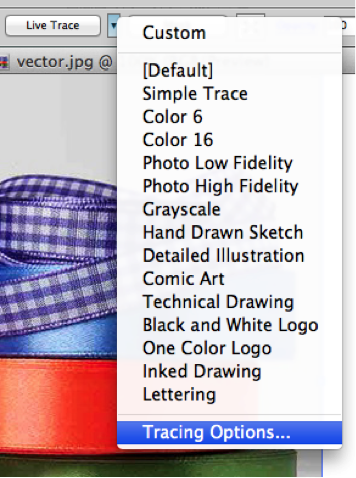
Either choose Tracing Options from the drop-down menu next to Live Trace at the top of the screen or go to Object → Live Trace → Tracing Options.

raster to vector step 1 Continue Reading →

Animated Social Media Icons by Acurax Responsive Web Designing Company